Sunday, March 17, 2013

Week 11 (March 11th) - Imagine

     This is probably one of my favorite cards to date. Not just within the 52 week challenge, but out of any I have made! The words themselves on this card mean so much to me. In one form or another, I have used these phrases the past few years to make a lot of my goals come true, including starting my own business. THAT however, will be another blog post...hopefully coming soon! 
     Anyway, back in July when I went to CKC in Lancaster, I saw this word stamp set and bought it right away because of the way it spoke to me. I also saw this set of three images together, and knew right away that they belonged with each other on a card. They are such elegant images and such strong words, that I kept this card much simpler than normal. The only extra touch this card has, is a single rhinestone in the middle panel (a little hard to see in the photo). There are no special punches, embossing or even dimensionals, which is also why I have not added instructions with this one. What you see is what you get...stamped images on card stock! 
     I hope you find this card as inspiring as I do!


From Stampin' Up
Card stock: Concord Crush, Pear Pizazz, Peach Parfait, Whisper White
Stampin' Write Markers: Concord Crush, Peach Parfait
(Papers and markers 2010-12 In Colors...clearance)
Rhinestone Basic Jewels
Snail Tape
Other
Stamp sets from Rubbernecker Stamps


Week 10 (March 4th) - Kindness Card

     The idea for this card has been in my head for a LONG time! It was inspired by a card in my very first Stampin' Up catalog as a demonstrator. I even cut and folded the card stock months ago! But of course, I was working on a pile of projects, and then the holidays came, and it all got pushed aside...until about 2 weeks ago when I was organizing my finished and unfinished cards. I found a sandwich baggie, and inside the sandwich baggie were 6 ready to make cards. SO...it was not a challenge what so ever to figure out which card I was making this week!


From Stampin' Up
Card stock: Wild Wasabi, So Saffron, Pefect Plum, Whisper White
I Heart Hearts stamp set
Heard From the Heart stamp set
Clear blocks C and E
Subtles Collection Stampin' Write Markers
Versa Mark ink pad
Stampin' Emboss Powder white
Heat tool
Big Shot
Fashionable Hearts Embosslits
Stampin' Dimensionals
Snail Tape
Scallop Eyelet Border Punch (clearance)

-Cut Wild Wasabi card stock. Score and fold in the center. 
-Cut two pieces of Whisper White card stock...one for the outside and one for the inside. Attach one piece to the inside of the card using Snail tape. This piece will be used to write your message on.
-Use the Wild Wasabi marker to color the Kindness stamp, and stamp towards the top of the white paper on the outside of the card. 
-Color other assorted hearts from the I Heart Hearts set with various Subtles markers. 
-Border punch a strip of Plum card stock and attach to the back of the stamped piece of paper using Snail tape. 
-Border punch a piece of Saffron card stock. Line it up with the Plum strip, and attach it to the back using Snail tape. 
-Take the piece of White paper and attach it to the front of the card using Snail tape. 
-Using one of the Heart Embosslits, emboss and cut a heart from the Saffron card stock. Attach it to the card using Snail tape. 
-Stamp one of the Hearts on Plum card stock using the Versa Mark ink. Cover in white embossing powder and use tool to heat emboss. 
-Cut out heart by hand, and attach to front of card using dimensionals.

Don't forget, you can order Stampin' Up products from me any time by going to my personal stamp page at
www.mbreamstamping.stampinup.net

Tuesday, March 5, 2013

Week 9 (February 25th) - Hmm...spirals!

     My first instinct right away was to call this week a mega-fail! HOWEVER...I always like to turn bad things in to happy accidents, and that is what I will call this weeks card. This week is also technically not finished, but it is a work in progress. Here is what happened...
     I went to the CKC last July in Lancaster PA (which is a big scrap booking convention). While I was there, I fell in love with this very intricate die cut. I spent probably a whole day wondering if I should get it or not, and ultimately decided not too since I wasnt quite sure what to do with it. Fast forward a few months to Christmas time. I received it as a gift from one of my friends that was at the convention, watching me pine over this thing! I was so excited to use it and I had mountains of problems.
     Long story short, it just doesn't cut right on the fancy foil paper that I bought for it. The paper is thick, and because of the intricacy of the die, it does not cut all the way into the middle. It is not the fault of the die cut or its manufacturer. It is really my fault for thinking I can fix everything in a frugal kind of way! I heard the woman at the convention telling another customer that you really need to metal shim for your die cut machine for these specific dies. So I thought I would just use a piece of paper as a shim as I had done in the past for other die cuts. Then of course I wound up not getting the die at the time, and my friend had no idea about the shim. So back in present day, I am trying this thing over and over again with a folded piece of paper as a shim, and it just isn't working. The paper still doesn't offer enough solid support, even folded four times! Needless to say, I will be getting the shim this July when I go to the convention again!
     So here I am wondering what to do with these card fronts I made, and no die cut to add to them. So I try it with regular card stock instead. It works (mostly) and it is beautiful! So much so, that it puts the card fronts I made to shame! I almost gave up, but then I said to myself...I have this piece that needs a card front PLUS I have these really cool scraps from the negative image. I decided to just make two individual cards and call it a learning experience.
     Unfortunately, the actual die cut is still sitting card-less. I REALLY need to think about how to use it on a card in a way that will compliment the design, otherwise its not worth it! I did, however, use my scraps to make a birthday card. I went with a rainbow theme with multiple spirals to represent the chakras of the body ( I am taking a class about that right now...VERY cool stuff). So if you understand chakras, you might like the card. Or if you just like rainbow colors and pretty designs, this fits the bill too! I even got to use that fancy silver foil paper as a border. Enjoy!

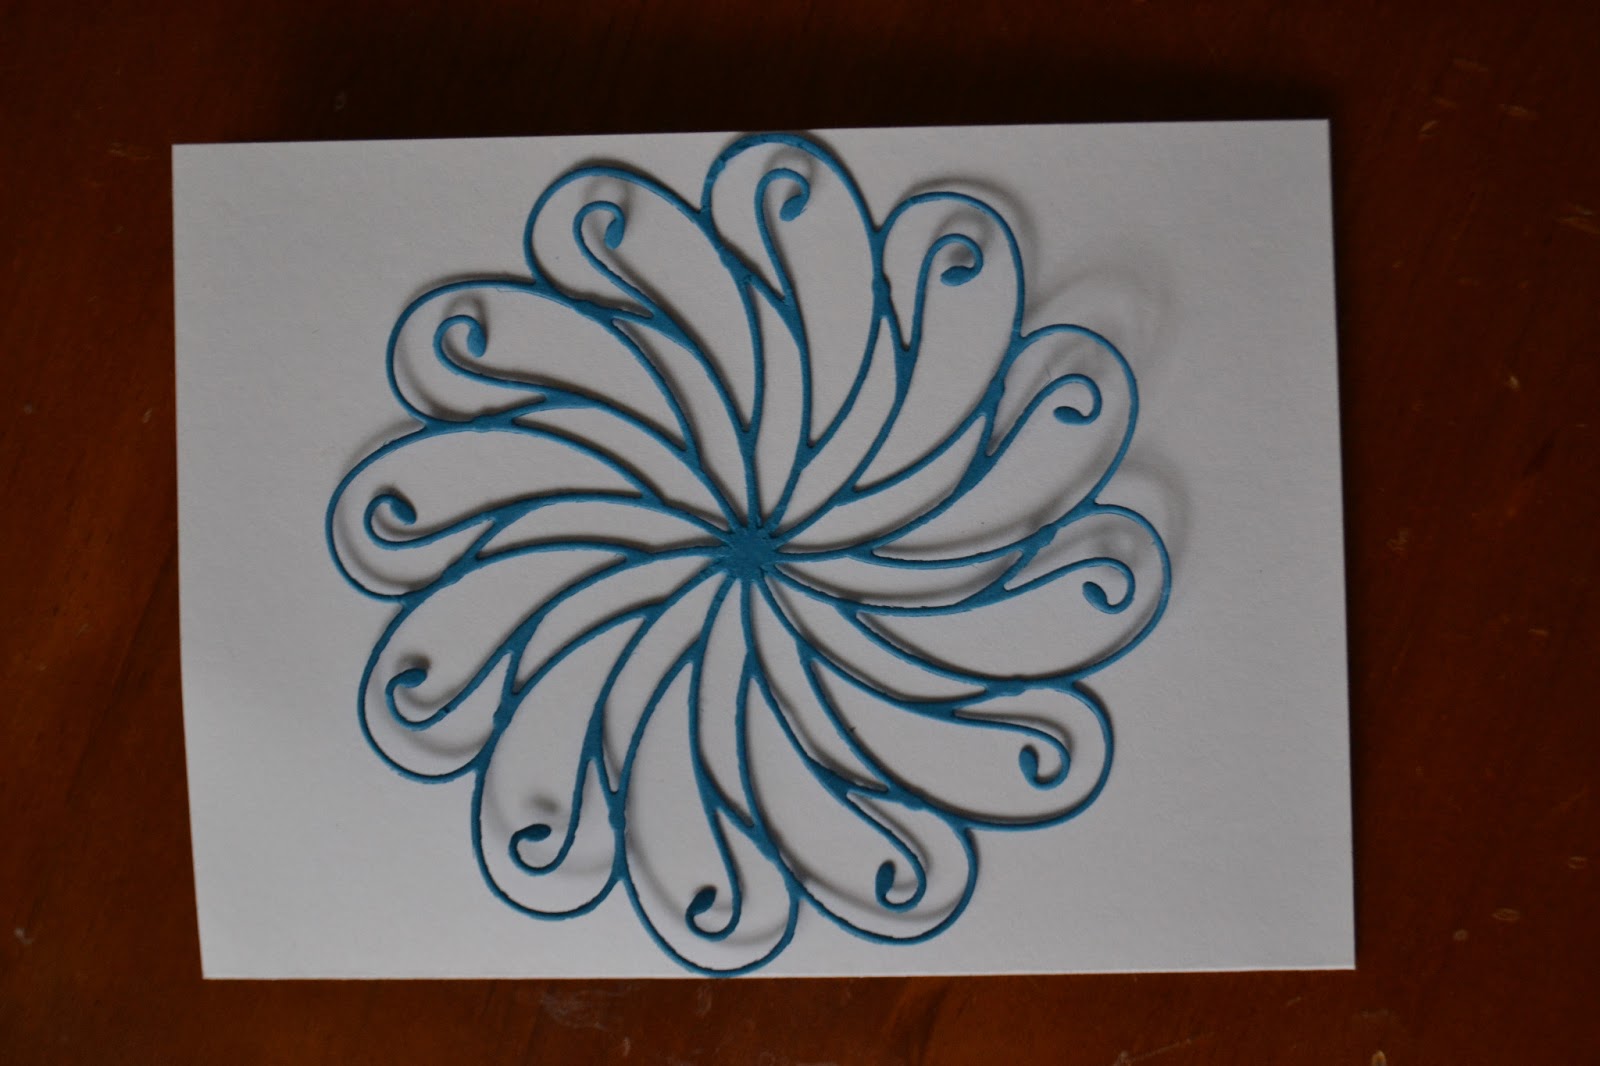
My beautiful, super delicate die cut that really needs some inspiration. It can ALMOST stand by itself, but I think I need an inspiring saying to go with it! I need to think about what to do before I can finish...

 My "chakra" birthday card! The big blue spiral is made from the negative paper scraps from the inside of the die cut. And my very shiny silver paper is the border on the card.

This was a very random and last minute card, so I am not going to get into instructions and supplies for this one. You can always contact me if you want more info. I will say, that I did get to use one of my FAVORITE Stampin' Up sets called Lacey and Lovely. It's a bunch of elegant but random circle designs. The green and red circle were made with that set. Check it out on the Stampin' Up page!