I am proud to be a Stampin' Up demonstrator, but I am sad to say that I had to get rid of my business website. This allows people to order products right through me. In the two and a half years I had it, I only got two new customers from it, so I decided to cut costs and cancel! Most of my customers are friends and family that add on to my own orders, or place orders during one of my events. I am still HAPPY to take anybody's order, especially if you are purchasing supplies that I used to make one of my cards! All you need to do is go to www.stampinup.com to order, and just choose me, Melinda Bream, as your demonstrator. I will change the link I currently have on this blog to take you right there instead of my personal site.
Thanks!

Friday, August 9, 2013
Weeks 23 through 28
If you are wondering why I have all these weeks lumped together, please see the previous post!


Update!
I was never very good at keeping up with this to start, but I realize it has now been over two months! OOPS! I am happy to say that I have been keeping up with my projects...just not writing about them. The reason is business related. MY business! Yes...my business, LilyRose Paper Crafts is official now. I have my sales license and my tax number. It was very scary to hit that submit button, but it was a life long dream come true when I did it.
One of the reasons I became official (other than to please the IRS of course), was so that I would be able to prove I was a real business so I could get into larger, and even juried shows. In the back of my head, I was scared to submit my work to anything, but I attended a business class in March, and the two people that ran that class said that I was indeed good enough and to go for it! So after grilling them about how juried shows work, I actually sent my information into a place that does a huge fall festival. I didn't have high hopes, because even though the man I spoke to was very nice, he emphasized that their items tended to be more on the artsy, not crafty style. He was willing to pass my info on to a more appropriate store, but of course to be representing the people that run the whole thing would be awesome. And so I sent pictures of my nicest work.....and didn't hear anything. Then one day, I got a phone call. It turned out that they received everything, but then lost my paperwork! He said if I was still available, they would love to have me be a vendor, right at their store! I was SO excited I jumped around the house, keeping it quiet so as not to wake up my kids :)
Reality set in then....this was a two day arts and crafts festival...both days a full 8 hours. I had never done a show that large! So all of my hopes to catch up on blogging went down the drain as I made a schedule to catch up on my craft items instead. Every week from the time I got back from vacation in July, until now, I have been making brand new cards, wreaths, and everything in between. I still have a lot to go, but I am on a good track. Since it will be a while....a LONG while....before I catch up with this again, I thought in the mean time I would leave some pictures of what I have been up to. ENJOY!!!
Monday, June 3, 2013
Week 22 (May 27th) - Monster Birthday
This card is near and dear to me. It was not specifically made for my card challenge, but for my son's birthday. However, making a card is still making a card, and using fun techniques and stamps, so it counts!
Back when I found out I was having a boy, I didn't know how to feel about it. I wanted a boy, since I already had a girl, but at the same time, I loved my little girl so dearly, and had no idea what to expect with a boy. Of course now, my universe revolves around both of them equally, each having a different special place in my heart. And I feel silly for ever having doubts about anything!
But one thing I do remember being excited about, was making invitations with my monster stamps (yes, this was before he was even born). So two years later, I was ready to have a monster party, and this is what I made!


Instructions coming soon!
All from Stampin' Up
Cardstock:
Pacific Point, Wild Wasabi, Pool Party
Brushed Silver, Wisper White
Versa Mark ink
Midnight Muse Stampin' Write Marker
Pacific Point Stampin' Write Marker
Make A Monster clear stamp set
Chevron embossing folder
Typeset Alphabet Bigs die cut
Big Shot
Tangerine Tango embossing powder
Week 21 (May 20th) - Doggie Greetings
My family is full of dog lovers, myself included. In fact, I can be lumped into the category of CRAZY dog lover, as I currently have three large dogs! My sister, is second behind me, having two large dogs. She is also one of my biggest supporters. So with the two things in combination, I often hear, "why don't you make dog themed cards and gifts?"
My answer is usually based around the fact that there are always more popular, and common, cards that need to be made. But one day, I had some extra time and I thought it was about time I tried. I thought about how to incorporate a theme that made sense, and not just dogs, dogs, dogs! So I came up with a thank you and a get well....two types of cards that I never have enough of.
These are great if you love dogs yourself, or if you need to give something to someone else that loves dogs. I even sold one already :)


Instructions
coming soon!
From Stampin' Up
Cardstock:
Crumb Cake, Real Red,
Pool Party, Wisper White
Stampin' Markers:
Pumpkin Pie, Chocolate Chip,
Pool Party, Summer Starfruit,
Midnight Muse
Honeycomb embossing folder
Big Shot
Send Me Soaring clear stamps (retired)
Pretty Petites clear stamps(SAB 2013)
DinoRoar clear stamps
clear blocks C and E
Silver brads
Sponge daubers
Snail adhesive
Michael's
Inkadinkadoo clear dog stamps
DCWV Plaid dog themed paper
Week 20 (May 13th) - Sweet Birthday
I got the layout idea for this card from a book. I am always trying to refresh my ideas by getting inspiration from other places!
When I saw the layout with the rectangles, for some reason, I immediately thought of using this paper with the cakes and candies. I have no idea why...perhaps just because I have been struggling with finding a good way to use this paper and this seemed like a nice, simple idea that really highlighted the images. I have had the paper for quite a while, being another awesome Stampin' Up clearance item I picked up because I liked it, not because I knew what to do with it. The brads, however, were a more recent clearance purchase, and when everything came together, I got really excited. I started to see it in my head, but it was still missing something. So I decided to pull out a technique I used over a year ago, adding glitter to sticky paper as an accent (it helps the glitter NOT wind up everywhere but your card!)
And so this very sparkly, very yummy, very cute birthday card was born!

Instructions coming soon!
All from Stampin' Up
Cardstock:
Pool Party, Wisteria Wonder,
Island Indigo, Calypso Coral
Stampin' Markers:
Pool Party, Island Indigo
Stampin Glitter Dazzling Diamonds
Snail Adhesive
Sweet Shop designer paper (retired)
Jelly Bean brads (retired)
sticky sheets (retired?)
All from Stampin' Up
Cardstock:
Pool Party, Wisteria Wonder,
Island Indigo, Calypso Coral
Stampin' Markers:
Pool Party, Island Indigo
Stampin Glitter Dazzling Diamonds
Snail Adhesive
Sweet Shop designer paper (retired)
Jelly Bean brads (retired)
sticky sheets (retired?)
Week 19 (May 6th) - Block floral Get Well
This is yet another card that I used a technique from our Stampin' Up regional event. We learned how to stamp with clear blocks! Not using clear blocks, as in put a stamp on the block like you would obviously do. But physically stamping with the block. It was the coolest thing!! Looking at the picture, you can probably tell that the orange squares are what I stamped with the blocks. It gives it a very "artsy" and subtle look. Plus, I FINALLY remembered to round some of my corners on this one. I love cards with rounded corners, and I always forget about doing it. It's such a tiny thing that makes a huge impact!
I made this card a get well card, as I recently had gotten some feedback that I need more options for them. I hope you enjoy it as much as I do!


Instructions coming soon!
All from Stampin' Up
Cardstock:
Pool Party, Whisper White,
Summer Starfruit
Classic Stamp Pads:
Pool Party, Calypso Coral
clear block C
Blossom Party Originals die cut
Big Shot
Designer Printed Brads Pool Party
(just retired!)
Curvey Verses wood stamps (retired)
Snail adhesive
Tuesday, May 28, 2013
Week 18 (April 29th) - Bookmarks
A few weeks ago, I was shopping for some random supplies, and I saw this little journal. I always love to look at journals, and occasionally, I let myself be suckered into buying one. I just HAD to buy it, because it was only a few dollars, and the cover was filled with what seemed like my life themes: Dream, create, smile, etc... It fit me perfectly. THEN I saw the matching rubber stamps that had the same sentiments, and I knew they had to be mine! I had no idea what to do with them...I didn't see them making popular cards. Then I remembered my sister telling me that I needed to make some bookmarks. So, that is what I did, and I think it was a perfect fit!

Instructions coming soon!
From Stampin' Up
Cardstock:
Island Indigo, Tangerine Tango,
Rich Razzleberry
Stampin' Markers:
Tangerine Tango, Island Indigo, Pool Party
Rich Razzleberry, Summer Starfruit
Sycamore Street designer series paper
Sycamore Street ribbon
(ribbon and paper SAB 2013)
Snail adhesive
Word stamps from Michael's
Week 17 (April 22nd) - Embossed Father's Day
I have to talk a little bit more about my experience at the Stampin' Up regional event in Baltimore. I learned SO many cool techniques, I will be incorporating them into my work for a while! We saw heat embossing done on black card stock. I don't do much with black, because I am such a color lover, but when I saw how the bright colors popped on the black, I thought it was amazing. The card we saw made some random colored streaks, which was neat. But I have had this hexagon stamp set since Christmas time, and I thought the bright colors with the geometric shapes would be perfect together. I think I was right!
Since the design elements seemed to have a manly feel to them, I decided to make one more Father's Day card to have in stock for my shows. I have not sold any yet, but there is still plenty of time before Father's Day!

Instructions coming soon!
From Stampin' Up
Cardstock:
Basic Black, Tempting Turquoise
Embossing powder:
Wild Wasabi, Tangerine Tango, White
Versa Mark ink
Something to Celebrate wood stamps (retired)
hexagon stamps from Stamps of Life
From Stampin' Up
Cardstock:
Basic Black, Tempting Turquoise
Embossing powder:
Wild Wasabi, Tangerine Tango, White
Versa Mark ink
Something to Celebrate wood stamps (retired)
hexagon stamps from Stamps of Life
Wednesday, May 22, 2013
Week 16 (April 15th) - Swap Card
Well, it has been about 6 weeks since I last posted, and I am glad to be back! It means that my craft fairs are over for now, and I can take a little "vacation" and catch up on my card challenge. It's not really catching up so much... I have been CONSTANTLY making cards and projects each week, sometimes specifically for the challenge, sometimes to sell and sometimes as a special order. With all that going on, I just didn't have the time to sit down and write about it.
Some of these cards are a little out of order, but I don't think that will really matter! They are just here for you to enjoy!
This first one I am writing about was conceived right after I went to the Stampin' Up regional event in Baltimore. It actually isn't my design, but one of the swaps I saw (Unfortunately, it was a picture of a friend's swap, so I don't have the creator's information to share). Her's was a little different in the colors and the images used, but I am CASE-ing her design. That's copy and share everything, in case you haven't heard the term. I saw it and loved it immediately! It was so simple and light and happy. I tend to want to go overboard on my designs, but I am trying to get away from that, so this design was good for me to try :)

Instructions coming soon!
All from Stampin' Up
Cardstock:
Whisper White, Pool Party,
Wisteria Wonder, Pretty in Pink
Stampin' Markers:
same as above, without Wisper White
Wisteria Wonder bakers twine
Perfect Polka Dots embossing folder
Big Shot
Circle Punches:
1 1/4" , 1 3/8" , 1 3/4" scallop
Spring Sampler clear stamps
(from Winter/Spring 2013 mini book)
clear block C
Monday, May 6, 2013
New Business Page
It has been a while since my last entry, as I am prepping for another show in mid-May! Once that is done, I will be back to posting weekly. I have kept up with the weekly projects...I just need the time to write them all out for you.
In the mean time, I have been getting some custom orders and special requests. So I have created a new and improved Facebook page, now open to the public! I will change the link I have to the current page, but for the time being, you can go to www.facebook.com/LilyRosePaperCrafts and "like" it! Thanks!!
In the mean time, I have been getting some custom orders and special requests. So I have created a new and improved Facebook page, now open to the public! I will change the link I have to the current page, but for the time being, you can go to www.facebook.com/LilyRosePaperCrafts and "like" it! Thanks!!
Tuesday, April 16, 2013
Week 15 (April 8th) - Adorable Little Boxes!
This week is a little bit of a cheat! Instead of making a card, I decided to make a little gift box. This still counts for my challenge. The cheating part is that I followed instructions from my most favorite crafter and her blog. Here is the link to her tutorial...
http://www.qbeesquest.blogspot.com/2012/02/clear-top-candy-box.html
And here is how I decided to make them!

Make sure to order your clear sheets for the tops from www.mbreamstamping.stampinup.net
http://www.qbeesquest.blogspot.com/2012/02/clear-top-candy-box.html
And here is how I decided to make them!

They are super easy and fun, and I think everyone should try one! :)
Make sure to order your clear sheets for the tops from www.mbreamstamping.stampinup.net
Monday, April 15, 2013
Week 14 (April 1st) - Collage Card Set
I am not a huge fan of craft paper, simply because it is not very bright! I am totally a color person, so neutral does not really appeal to me. However, I felt very inspired during a recent trip to Michael's when I found some packs of paper that included craft paper, along with some very bright blues, reds and pinks. It was even better when I found the matching embellishments! So I bought the paper and embellishments, with the intent of making a new card set. It was a goal of mine to make more matching sets during my card challenge year, so these items seemed to be perfect for that.


Instructions coming soon!
From Stampin' Up
card stock: Primrose Petals, Crumb Cake,
Pool Party, Real Red
Classic Stampin' Ink: Midnight Muse, Real Red,
Raspberry Ripple
Live Laugh Love wood stamp set (retired)
Pretty Petites clear stamp set (Sale A Bration 2013)
Posy Punch clear stamp set (retired hostess set)
Sweet Essentials clear stamp set
Happiest Birthday Wishes clear stamp set
Michael's
Assorted Craft Paper Melodies and Lace
Assorted Jewels Melodies and Lace
Assorted Paper Flowers Melodies and Lace
These cards were very simple to make....they are all 4" x 4" square cards. The papers used as the bases of the cards are all using the Stampin' Up papers listed above. All of the decorative square and rectangle pieces were cut from the assorted Michaels paper. I am not going to list all of the dimensions for these cards, as the pictures are very easy to follow! All of the stamped images use the inks and stamp sets listed above. And of course, these sentiments are fairly simple and straightforward, so any sentiment set would do. Sweet Essentials is actually a great set to use, since it has a good variety of words.
Feel free to contact me with any questions!
Week 13 (March 25th) - Mother's Day
Yes, I made my Father's Day card before my Mother's Day card! That's just because that one was easier... technically my Mother's Day card was planned in my head first. I am VERY pleased with my card, however, it was ALOT of work, and I was happy when they were finished. Apparently, the hard work was worth the effort, because two of them sold at my recent show!


From Stampin' Up
card stock: Primrose Petals, Whisper White, Lucky Limeade
Stampin' Write markers: Primrose Petals, Bashful Blue,
Lucky Limeade, Concord Crush (retired In Color)
Fancy Flower punch
Posy Punch clear stamp set (retired hostess set)
Something to Celebrate wood stamp set (retired hostess set)
Festive Paper Piercing kit
paper piercing tool
Big Shot
Labels Collection framelits
Snail adhesive
Stampin' Dimensionals
Michael's
Inkadinkadoo Floral clear stamp set
-Cut a 4 1/4" x 11" piece of Primrose Petals card stock. Score in the center and fold, making a 4 1/4" x 5 1/2" card
-Use the biggest Labels Collection die cut as a template on the front flap, and trace the design with a pencil. Cut along your pattern with scissors (you can not run this through the Big Shot because it is too wide, but also because running it through will cut out the whole label, and you only want half of a label to serve as the front of your card)
-Using the paper piercing kit, pierce along the edge of your cut card flap.
-Run a piece of Whisper White card stock through the Big Shot using the third largest label die (you should have used the largest to trace your flap design.
-Choose one of the floral images from the Inkadinkadoo stamp set, color it with Primrose Petals, Bashful Blue, Lucky Limeade and Concord Crush Stampin' Markers, and stamp the image twice on your white die cut piece.
-Color one of the flowers from the Posy Punch stamp set with Primrose Petals and Concord Crush Stampin' Markers. Punch it out using the fancy flower punch. Attach it to your white label piece using a Stampin' Dimensional.
-Attach your white label piece to the front flap of your card using Snail tape. Trim the top edge that will be hanging over.
-On Whisper White card stock, Stamp Happy Mother's Day, using the Primrose Petals Stampin' Marker and the stamp from the Something to Celebrate stamp set.
-Trim your Mother's Day piece into a strip and cut a triangle out of the end to give it a banner look. Using Snail tape, attach this to a piece of Lucky Limeade and trim to make a border.
-Attach the finished Mother's Day "banner" to the front of the card, slipping it under your large flower.
Don't forget, you can order Stampin' Up products from me any time by going on my personal stamping site www.mbreamstamping.stampinup.net
Week 12 (March 18th) - Happy Father's Day
I am WAY behind in posting my weeks, but fear not! The projects are actually complete! As I mentioned in my last post, I was spending night and day getting ready for my first show of the year, on top of preparing for my very first Stampin' Up regional event. Both events happened this past Saturday, so now I can finally sit down and talk about the projects I was making (which also went into my show!)

The first new card I made, was a Father's Day card. I had been waiting and waiting for a good occasion to use my new hexagon embossing plate from Stampin' Up, and I thought Father's Day was a nice manly occasion that would fit the hexagons. Plus, I had never made a Father's Day card, and I had been asked at previous shows if I had any in stock. So now was as good a time as ever!
I am very pleased with my first "manly" card attempt, and believe it or not, it was fun to cut out all those little hexagons and place them on the card. Yeah....they are hand cut! :)

From Stampin' Up
Card stock: Crumb Cake, Very Vanilla, Chocolate Chip
Classic Stapin' Ink pad: Old Olive, Bashful Blue
sponge daubers
Big Shot
Honeycomb embossing plate
Decorative label punch
Snail adhesive
Stampin' Dimensionals
Something to Celebrate wood stamp set (retired hostess set)
From Michael's
American Craft Fall Stripe ribbon
DCWV Fashion District patterned paper
-Cut a 4 1/4" x 11" piece of Crumb Cake card stock. Score and fold in the middle, creating a 4 1/4" x 5 1/2" card.
-Put the paper in the honeycomb embossing folder. You will have to keep the card closed in order for it to fit when you are running it through the Big Shot the proper way (you are only embossing the front flap, not both front and back together)
-Run each piece of patterned paper through the machine as well. This will create the pattern on the paper that you can then use as guidelines for cutting out all of your little hexagons.
-I used five different patterns, cutting three hexagons out of each and then placed them randomly using my Snail tape.
-Once all the individual hexagons are attached to the front, you can run a piece of ribbon across the top where the pattern ends. I used Snail tape on the back of the ribbon to keep it in place, then trimmed the ribbon at each edge.
-Stamp Happy Father's Day in Old Olive Ink on Very Vanilla card stock and use the label punch to punch it out.
-Using a sponge dauber, ink the edge of your label with Bashful Blue ink.
-Punch an additional label from the Chocolate Chip card stock and cut in half vertically. You will place this behind the Vanilla piece and attach with Snail tape, making a frame on each side. (see picture)
-Using dimensionals, place your finished label on the front of the card in your desired location. All finished!
Monday, April 1, 2013
Catching Up!
Don't worry! I have not abandoned the weekly posts after only three months! I have been VERY busy getting ready for two upcoming craft shows. Weeks 12, 13, 14 and yes, probably 15, won't be up until after the completion of the first show on April 13th. I do in fact, have the projects done for those first three weeks. I do not, however, have the time to write about them!
Just a little preview....there will be a Mother's Day card, a Father's Day card and a new five card set. I am very excited about all of them, and I can't wait to post them.
I will take a few minutes to talk about all of my exciting events! On Saturday, April 13th, I will be part of a very small craft show that is in conjunction with a fashion show/fundraiser for the Souderton Telford Business and Professional Womens Foundation.
http://www.soudertontelfordbpw.org/event/fashion-show-luncheon/
I am very excited about this one, because I was actually ASKED to be there, and there is a limited number of vendors that will be there. The only unfortunate part, is that I myself will not be there. My wonderful sister will be filling in for me, as I will be down in MD for a Stampin' Up regional event. We both knew it was too good of an opportunity for my new official business, "LilyRose Paper Crafts"(more on THAT piece of news later!)
The other craft fair I am attending is part of the two day Relay for Life event that will be held at Upper Dublin High School on May 17th and 18th (the craft fair is on the 18th). All the benefits go toward the American Cancer Society, including 20% of each participating vendors sales. SO come check out LilyRose Paper Crafts and buy some stuff for a good cause!
Sunday, March 17, 2013
Week 11 (March 11th) - Imagine
This is probably one of my favorite cards to date. Not just within the 52 week challenge, but out of any I have made! The words themselves on this card mean so much to me. In one form or another, I have used these phrases the past few years to make a lot of my goals come true, including starting my own business. THAT however, will be another blog post...hopefully coming soon!
Anyway, back in July when I went to CKC in Lancaster, I saw this word stamp set and bought it right away because of the way it spoke to me. I also saw this set of three images together, and knew right away that they belonged with each other on a card. They are such elegant images and such strong words, that I kept this card much simpler than normal. The only extra touch this card has, is a single rhinestone in the middle panel (a little hard to see in the photo). There are no special punches, embossing or even dimensionals, which is also why I have not added instructions with this one. What you see is what you get...stamped images on card stock!
I hope you find this card as inspiring as I do!

From Stampin' Up
Card stock: Concord Crush, Pear Pizazz, Peach Parfait, Whisper White
Stampin' Write Markers: Concord Crush, Peach Parfait
(Papers and markers 2010-12 In Colors...clearance)
Rhinestone Basic Jewels
Snail Tape
Other
Stamp sets from Rubbernecker Stamps
Week 10 (March 4th) - Kindness Card
The idea for this card has been in my head for a LONG time! It was inspired by a card in my very first Stampin' Up catalog as a demonstrator. I even cut and folded the card stock months ago! But of course, I was working on a pile of projects, and then the holidays came, and it all got pushed aside...until about 2 weeks ago when I was organizing my finished and unfinished cards. I found a sandwich baggie, and inside the sandwich baggie were 6 ready to make cards. SO...it was not a challenge what so ever to figure out which card I was making this week!


From Stampin' Up
Card stock: Wild Wasabi, So Saffron, Pefect Plum, Whisper White
I Heart Hearts stamp set
Heard From the Heart stamp set
Clear blocks C and E
Subtles Collection Stampin' Write Markers
Versa Mark ink pad
Stampin' Emboss Powder white
Heat tool
Big Shot
Fashionable Hearts Embosslits
Stampin' Dimensionals
Snail Tape
Scallop Eyelet Border Punch (clearance)
-Cut Wild Wasabi card stock. Score and fold in the center.
-Cut two pieces of Whisper White card stock...one for the outside and one for the inside. Attach one piece to the inside of the card using Snail tape. This piece will be used to write your message on.
-Use the Wild Wasabi marker to color the Kindness stamp, and stamp towards the top of the white paper on the outside of the card.
-Color other assorted hearts from the I Heart Hearts set with various Subtles markers.
-Border punch a strip of Plum card stock and attach to the back of the stamped piece of paper using Snail tape.
-Border punch a piece of Saffron card stock. Line it up with the Plum strip, and attach it to the back using Snail tape.
-Take the piece of White paper and attach it to the front of the card using Snail tape.
-Using one of the Heart Embosslits, emboss and cut a heart from the Saffron card stock. Attach it to the card using Snail tape.
-Stamp one of the Hearts on Plum card stock using the Versa Mark ink. Cover in white embossing powder and use tool to heat emboss.
-Cut out heart by hand, and attach to front of card using dimensionals.
Don't forget, you can order Stampin' Up products from me any time by going to my personal stamp page at
www.mbreamstamping.stampinup.net
Don't forget, you can order Stampin' Up products from me any time by going to my personal stamp page at
www.mbreamstamping.stampinup.net
Tuesday, March 5, 2013
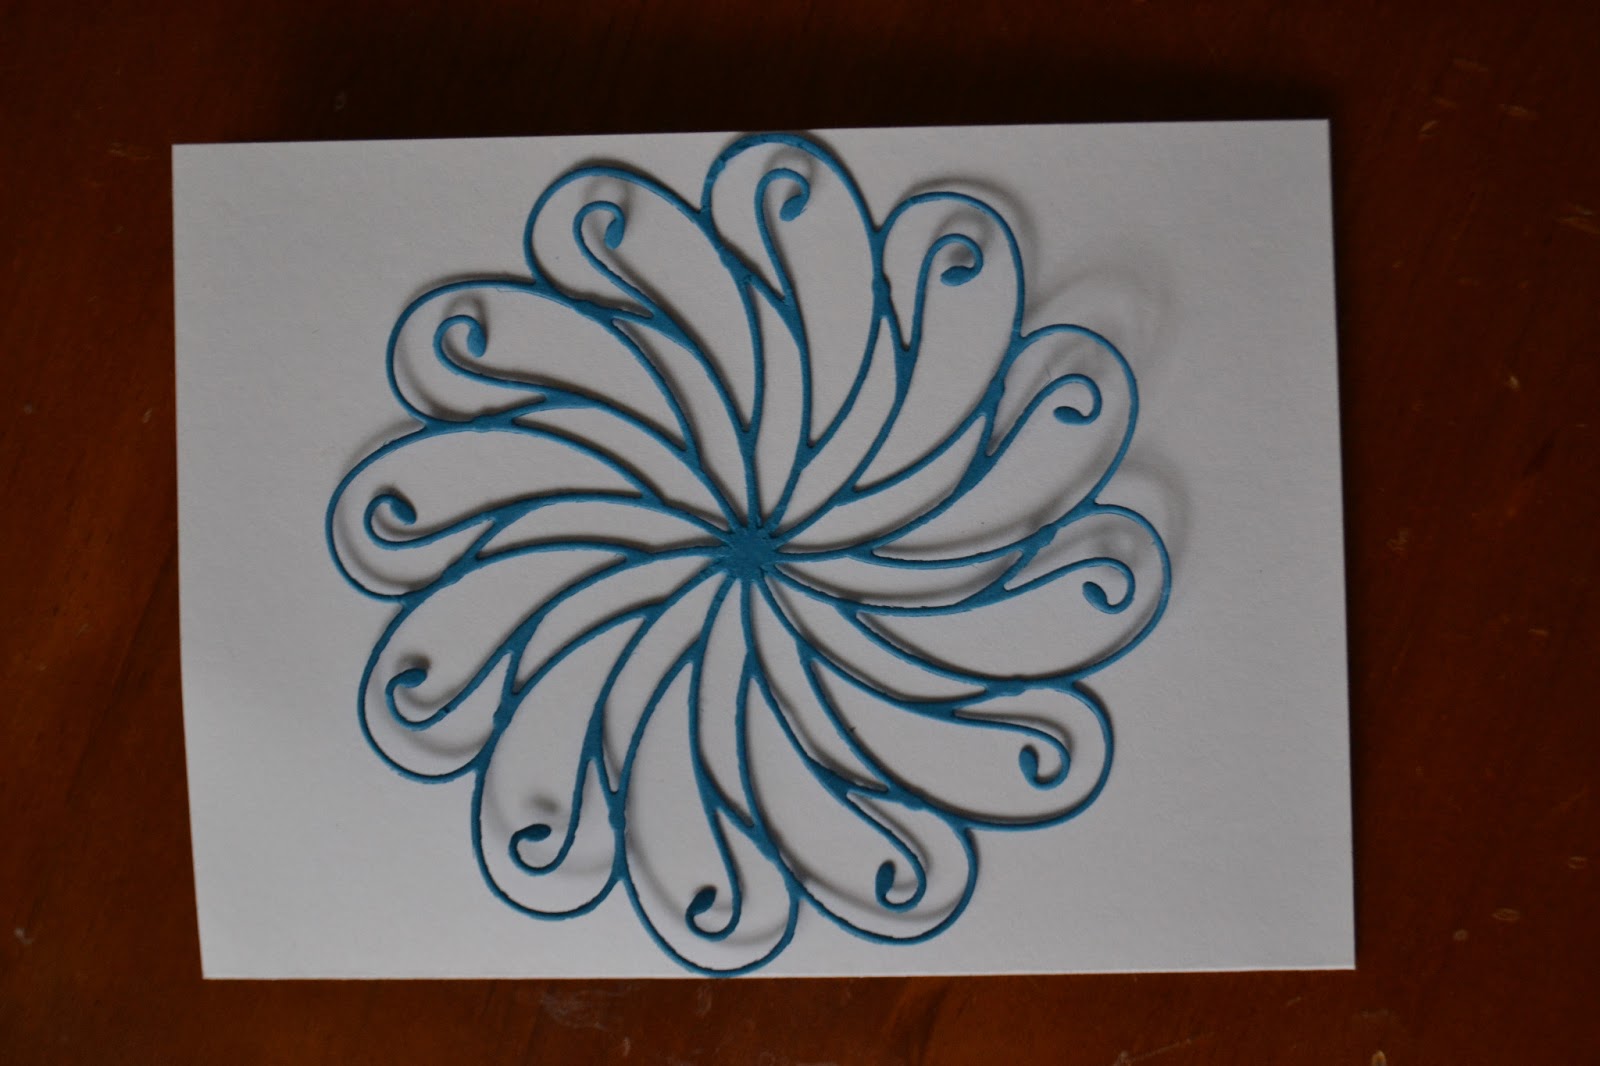
Week 9 (February 25th) - Hmm...spirals!
My first instinct right away was to call this week a mega-fail! HOWEVER...I always like to turn bad things in to happy accidents, and that is what I will call this weeks card. This week is also technically not finished, but it is a work in progress. Here is what happened...
I went to the CKC last July in Lancaster PA (which is a big scrap booking convention). While I was there, I fell in love with this very intricate die cut. I spent probably a whole day wondering if I should get it or not, and ultimately decided not too since I wasnt quite sure what to do with it. Fast forward a few months to Christmas time. I received it as a gift from one of my friends that was at the convention, watching me pine over this thing! I was so excited to use it and I had mountains of problems.
Long story short, it just doesn't cut right on the fancy foil paper that I bought for it. The paper is thick, and because of the intricacy of the die, it does not cut all the way into the middle. It is not the fault of the die cut or its manufacturer. It is really my fault for thinking I can fix everything in a frugal kind of way! I heard the woman at the convention telling another customer that you really need to metal shim for your die cut machine for these specific dies. So I thought I would just use a piece of paper as a shim as I had done in the past for other die cuts. Then of course I wound up not getting the die at the time, and my friend had no idea about the shim. So back in present day, I am trying this thing over and over again with a folded piece of paper as a shim, and it just isn't working. The paper still doesn't offer enough solid support, even folded four times! Needless to say, I will be getting the shim this July when I go to the convention again!
So here I am wondering what to do with these card fronts I made, and no die cut to add to them. So I try it with regular card stock instead. It works (mostly) and it is beautiful! So much so, that it puts the card fronts I made to shame! I almost gave up, but then I said to myself...I have this piece that needs a card front PLUS I have these really cool scraps from the negative image. I decided to just make two individual cards and call it a learning experience.
Unfortunately, the actual die cut is still sitting card-less. I REALLY need to think about how to use it on a card in a way that will compliment the design, otherwise its not worth it! I did, however, use my scraps to make a birthday card. I went with a rainbow theme with multiple spirals to represent the chakras of the body ( I am taking a class about that right now...VERY cool stuff). So if you understand chakras, you might like the card. Or if you just like rainbow colors and pretty designs, this fits the bill too! I even got to use that fancy silver foil paper as a border. Enjoy!
My beautiful, super delicate die cut that really needs some inspiration. It can ALMOST stand by itself, but I think I need an inspiring saying to go with it! I need to think about what to do before I can finish...
My "chakra" birthday card! The big blue spiral is made from the negative paper scraps from the inside of the die cut. And my very shiny silver paper is the border on the card.
This was a very random and last minute card, so I am not going to get into instructions and supplies for this one. You can always contact me if you want more info. I will say, that I did get to use one of my FAVORITE Stampin' Up sets called Lacey and Lovely. It's a bunch of elegant but random circle designs. The green and red circle were made with that set. Check it out on the Stampin' Up page!
Monday, February 25, 2013
Upcoming Classes!
I teach almost every month out of my home, mostly to a group of varying friends and family. Since I started doing it 2 years ago, I have goten more and more enjoyment out of it. So in the fall, I looked into teaching some stamping classes for a few adult education programs at different local school districts. Two of those classes are coming up in March, so check out the information, register, and join me! (if you are in the area of course).
The first one coming up is March 6th in the Upper Dublin PA district.....here is the brochure write up, followed by the link for the actual brochure and registration
The second one is March 21st in the New Hope Soleburry District....here is the brochure write up, followed by the link for the actual brochure and registration
Stamping Introduction- Create Your Own Cards and Gifts
Learn rubber stamping techniques that can be used for making cards, scrapbook pages and gifts. Demonstration of the latest tools and techniques with hands-on designing of cards, decorative boxes or bags, and other specialties. Leave with your own creations.
Fee: $25 (Plus $15 materials fee to instructor for materials)
Course: RFNRT 3308 Sec. C80
Thurs, Mar. 21, 6:30-9 pm
Location: NH-S High School, Room 301
Instructor: Melinda Bream
http://www.csnhs.org/
Check them out!
The first one coming up is March 6th in the Upper Dublin PA district.....here is the brochure write up, followed by the link for the actual brochure and registration
!
PAPER CRAFTING: Gift Presentation
UDHS A66
1 WED. 03/06 $20/10 6:30
-
9:00PM
Learn the basics of paper crafting and stamping. You will watch demonstra-
tions of different techniques and tools, and get the chance to try them out
yourself by making a gift bag, a set of gift card holders, and a gift purse that
you can take home with you!
Please bring material fee of $15 to first class
payable to the instructor
.
http://www.udsd.org/page.cfm?p=38 The second one is March 21st in the New Hope Soleburry District....here is the brochure write up, followed by the link for the actual brochure and registration
Stamping Introduction- Create Your Own Cards and Gifts
Learn rubber stamping techniques that can be used for making cards, scrapbook pages and gifts. Demonstration of the latest tools and techniques with hands-on designing of cards, decorative boxes or bags, and other specialties. Leave with your own creations.
Fee: $25 (Plus $15 materials fee to instructor for materials)
Course: RFNRT 3308 Sec. C80
Thurs, Mar. 21, 6:30-9 pm
Location: NH-S High School, Room 301
Instructor: Melinda Bream
http://www.csnhs.org/
Check them out!
Week 8 (February 18th) - Embellished Elephant
This was a very special card for a very special little girl! My best friends daughter just turned two. She is the closest thing I have to a niece for the time being, so I love to make special things for her. SO, I decided to use her card for this week because it is a shaped card, and I would love to get into making more shape cards. They pretty much always look adorable!
I actually used a template (sort of) for this card. I have a free digital copy of Paper Crafts Magazine presents Birthdays. This cute little elephant was right on the first page, and as soon as I saw it, I knew this would be the special card I was looking for. There is an actual template that you can use, but since it would have been a pain to get on and print it out, I just winged it. Its a pretty easy shape to draw, so I didn't have any issues with it. So here is my version of the elephant card!

I actually used a template (sort of) for this card. I have a free digital copy of Paper Crafts Magazine presents Birthdays. This cute little elephant was right on the first page, and as soon as I saw it, I knew this would be the special card I was looking for. There is an actual template that you can use, but since it would have been a pain to get on and print it out, I just winged it. Its a pretty easy shape to draw, so I didn't have any issues with it. So here is my version of the elephant card!
From Stampin' Up
Card stock: Melon Mambo, So Saffron, Brushed Silver
Pool Party Bakers Twine
Snail Adhesive
From Michael's
Patter paper from Best of K and Company
Orange and black rhinestones
Spool O Ribbon
Glue Dots medium
-Cut a 6" x 8" piece of Silver card stock. Score and fold in the middle to make a 4" x 6" card.
-Sketch the elephant shape on a piece of scrap paper and cut out. Trace the shape on the front of your card, and cut out. Make sure the card is folded...you do want both the front and back shaped!
-Cut a rectangle of patterned paper and then a larger piece of Melon Mambo to fit behind the patterned piece (I am not giving particular sizes, since it depends on the proportions of the elephant you drew). Attach the two pieces together using Snail tape.
-Using a standard hole punch, punch three holes at the bottom of your rectangle.
-Cut three pieces of ribbon and attach them to the holes using your preferred tying method.
-Attach your rectangle to the elephant using Snail tape.
-Cut a triangle of Melon Mambo to cover your elephants head and attach with Snail tape. Cut a piece of patterned paper to attach to the hat as trim at the bottom.
-Attach a glue dot to the top point of the hat on the backside. Cut various small lengths of ribbon to attach to the glue dot. Once you have the desired "tassle" look on the top of the hat, add an orange rhinestone to the top point.
-Cut a ballon shape from So Saffron card stock. Add extra punched hole pieces to the front for extra decoration.
-Position the balloon so part of it is covering your elephant...this is where you will apply your Snail tape on the back side. Before adhering the balloon, cut a piece of Pool Party twine and put the end between the balloon and the elephant. This will hold your twine in place. Then position the rest of the loose twine so it comes out the bottom of the balloon. Let some extra twine hang down, before wrapping the extra around the elephants tail.
*TIP: You can add a tiny bit of Snail to the front of the tail to help hold the twine in place. Add the black rhinestone for his eye.
I apologize if some of the technical parts of this card are a little vague....they were hard to describe! When making this card, I just kind of kept testing different ideas until something worked, especially with the balloon and the twine. Feel free to figure out what works best for you and enjoy it! It is TOO cute when it's all done :)
Friday, February 15, 2013
Sale-A-Bration
I have mentioned Sale-A-Bration time at Stampin' Up in my last few posts. I thought I would shed a little more light on it, since it is my favorite time of year! During this time, you can get lots of free goodies. For every $50 you spend (not including shipping and tax), you get to choose something from the Sale-A-Bration brochure. Every year, the brochure is filled with new and usually exclusive products. This means you will only see them during the sale. There are usually some regular catalog choices as well, but I would rather go for the new stuff! I have earned a great deal of product so far, due to the face that I have many projects going on the first few months of this year. I LOVE every single one of them, especially the designer paper. Every year I have been with them, I have made it a priority to earn these products, and every year I am never disappointed!
If you want to check out the free things you can earn, check out this link!
http://www.stampinup.com/ECWeb/default.aspx
It will take you to my personal site and just click on the See What You Can Get button right in the middle, and the brochure will pop up! Feel free to contact me on the blog or email me...mhdesigns2@gmail.com
Thanks and enjoy!
Week 7 (February 11th) - Sweet Sale Set
I am proud to say, this is my very first set of cards I have made! I have had many ideas over the years for making sets, some with the same sentiment but different designs, or all different sentiments with the same color scheme. This set is the latter of the two.
I received this stamp set when I became a Stampin' Up demonstrator. It's easy to see why...it has cute, simple designs, appropriate for a number of occasions. I used this set once or twice for demonstrations, because of this versatility, but I admit that I never got to use it for any big projects. So it has sat upon my stamp shelf for two years, and whenever I come across it I think, that would make a PERFECT set! And so it has!
I wanted to keep them simple and modern, and make them square. Something about little square cards appeals to me. Probably because they are a little bit outside of the norm, just like me. I decided to pair the stamp designs with the current Sale-A-Bration designer series paper. I got this paper as a free goody, as part of the sale period. And I loved it so much, I made sure I earned a second pack! (Sale-A-Bration runs this year until March 22nd, so contact me if you want some info! There is still plenty of time to earn your free stuff!!) I was worried at first that the patterns might be too distracting with the stamp designs, but after sorting through and certain patterns with certain stamps, I think I came up with some pretty good combinations.And FYI....the adorable little buttons I used were also free during Sale-A-Bration.
Hopefully, this will be the first of many sets, and I hope even more, that next time I will have just a BIT more time to make a matching box!

All from Stampin' Up
Sycamore Street designer series paper (2013 S-A-B promo)
Buttons from Sycamore Street ribbon and button pack (2013 S-A-B promo)
Card Stock: Tangerine Tango, Rich Razzleberry, Island Indigo,
Pool Party, Summer Starfruit, Whisper White
Stampin' Write markers: Tangerine Tango, Rich Razzleberry,
Island Indigo, Pool Party, Summer Starfruit
Classic Ink Pad-Basic Black
Snail Adhesive
Fun and Fast Notes wood stamp set (retired)
Cut 5 pieces of cardstock, 4" x 8", out of each of the 5 colors. Score in the middle and fold.
Cut 3.5" x 3.5" pieces of coordinating pieces of Designer Series paper, ad attach to the front of the cards with Snail tape.
Stamp each image (without inking the sentiment) on white card stock using black ink, and trim to a 2" x 2" piece. Color each image with assorted Stampin' Write markers.
Using Snail tape, attach the stamped image piece to a coordinating piece of colored card stock (you can follow the color scheme in my picture, or make your own!) I trimmed the colored paper so that only 1/8" was framing the white paper.
Stamp each sentiment in a coordinating color. Stamp each sentiment in a different color, and then trim into a strip. Cut the ends of each strip to make an arrow....a point on one end, and an indentation on the other, like in the picture.
Back each sentiment strip in the same color you used to frame your white. I cut mine with scissors, just eye-balling the width of the colored piece that would show. Trimming less than an 1/8" with a paper cutter is very tricky!
Put Snail tape on the back of each image piece and each sentiment piece, then attach to the front if the card, using whatever spacing you prefer.
Put a glue dot on the back of each button, and attach to the pointy end of the sentiment strip.
Now you have 5 awesome cards!
Don't forget, you can order Stampin' Up products from me any time by going to my personal stamping site
www.mbreamstamping.stampinup.net
Don't forget, you can order Stampin' Up products from me any time by going to my personal stamping site
www.mbreamstamping.stampinup.net
Week 6 (February 4th) - Christmas Cheer
This is not my first Christmas card post AFTER Christmas, nor will it be my last! Christmas cards are probably my most favorite, and there is never enough time around Christmas to make as many as I want. So I will be throwing one in occasionally here and there.
This is technically my second Christmas Cheer card that I have made in my card making career. Back when I first started making cards, I would buy things that were cute with the intention of doing something with them eventually...which I still have a habit of doing now! I bought this cute 99 cent ribbon that had bright little martinis on it, but instead of olives, they had candy canes in them. The thought of "Christmas Cheer" came to mind and thus my first card was born. Many people loved it, some thought drinks and Christmas were a bizarre mix. Either way, I new someday I would find a way to make more (my supply was limited based on the fact that cheap ribbon usually only means a yard or two).
Enter in the new 2012-2013 Stampin' Up catalog! There in it's glossy pages was a WHOLE stamp set devoted to drinks, with sayings about Happy Hour and Cheers and fun things like that. I loved it instantly. I also could not justify buying it right away. I always try to buy stamps that are very versatile, and this had slightly limited uses. However, I loved the cute little geometric patterned beverages so much, that it was put on my "Fun List" to buy in the future. I wound up asking Santa for it for Christmas, and there it was under my tree!
I knew that the very first card I would make would be for Christmas, even though it's a bit late. And this is that card! Before getting into the technicalities of it, I want to mention that this card taught me an important lesson that every good crafter should learn. Always stick with your first instincts and ideas! I knew this card should be a skinny vertical layout, but once I started stamping, I realized the images would be too big for what I was intending. SO I made it horizontal and fiddled with it until I was kind of happy with it. For me, just kind of happy isn't enough. I stared at it until I thought, hmm....maybe I should turn it vertical and try again. As soon as I turned it, it got 85% better in my head. Then I made one little trim to it, making it more narrow, and that added the other 15% of perfection that I needed to be completely happy with it!
Below is a picture of the progression it took...I felt like I needed to document it since they were such tiny changes that made such a huge difference to me. And of course the usual supply list and instructions...soon :)

This is technically my second Christmas Cheer card that I have made in my card making career. Back when I first started making cards, I would buy things that were cute with the intention of doing something with them eventually...which I still have a habit of doing now! I bought this cute 99 cent ribbon that had bright little martinis on it, but instead of olives, they had candy canes in them. The thought of "Christmas Cheer" came to mind and thus my first card was born. Many people loved it, some thought drinks and Christmas were a bizarre mix. Either way, I new someday I would find a way to make more (my supply was limited based on the fact that cheap ribbon usually only means a yard or two).
Enter in the new 2012-2013 Stampin' Up catalog! There in it's glossy pages was a WHOLE stamp set devoted to drinks, with sayings about Happy Hour and Cheers and fun things like that. I loved it instantly. I also could not justify buying it right away. I always try to buy stamps that are very versatile, and this had slightly limited uses. However, I loved the cute little geometric patterned beverages so much, that it was put on my "Fun List" to buy in the future. I wound up asking Santa for it for Christmas, and there it was under my tree!
Below is a picture of the progression it took...I felt like I needed to document it since they were such tiny changes that made such a huge difference to me. And of course the usual supply list and instructions...soon :)
 |
| Idea progression |

(Supply list and instructions coming soon!)
Sunday, February 10, 2013
Week 5 (January 27th) - Catch Up!
This week has a few projects in one, and they are a bit different than my previous weeks. Every week, I strive to come up with an original idea, and try to incorporate something new....a new technique, a new tool, a new layout, etc. I had one of these ideas, and I decided to push it back until the following week. What I did instead, I feel still fits into the definition of my card challenge.
I had 2 cards that I made as samples for an Intro to Rubber Stamping class that I was supposed to teach. Unfortunately, the class did not happen due to low enrollment. I vowed to make more of these cards to add to my stock. I often make a card that I am happy with and think it would be nice to have more of them, but I never find the time to do it. THIS is how it fit into my challenge! I was able to make myself do something that I don't usually get around to doing!
One is a Happy Birthday card, and the other was designed as a Valentines card in time with the class. But it can certainly be used for someone special any time of the year. The other cards you will see here were samples I recently made for a Stampin' Up party that I helped host for a friend of mine. At every party, I demonstrate a card and then the guests make the same or a similar card. I made these cards using the new Sale-A-Bration products for 2013. The inspiration for them came from a similar design my friend liked in the Spring Catalog. It was not my usual style, but I wanted to make something that would be appropriate for her and her friends. I wound up loving them, and I decided to complete the extras that I made.
Again, I did use my challenge week to complete a project I normally might not have. So even though I pushed back my other idea to complete these projects that were in limbo, I don't think I cheated! Besides, it's my personal project, so I guess I can make my own rules!!

All from Stampin' Up
Real Red card stock
Island Indigo card stock
Whisper White card stock
Scallop Trim border punch
Textured Impressions Stripes embossing folder
Big Shot
Snail Adhesive
Stampin’ Write Markers:
Basic Grey, Island Indigo
Brights Collection-Real Red, Old Olive, Daffodil Delight,
Pumpkin Pie
Clear Block E
Patterned Party clear stamp set
Jewel Basic Rhinestones
Party Hearty wood stamp set (retired)
Use border punch on the long side
of the blue paper.
Using the stripe embossing folder,
run the blue paper through the Big Shot (the lines should be horizontal,
leaving the punched border OUT of the folder).
Attach the white paper to the red
card front, off-center to the left, using a piece of snail tape in each corner.
Attach the embossed blue paper to
the card front, off-center toward the right, using a piece of snail tape in
each corner.
Color the balloon stamp, using grey
for the strings, and assorted colors for the balloons. Stamp the word Celebrate
along the left most balloon string.
Attach self sticking gemstone to one
of the balloon.

All from Stampin' Up
Pool Party
Primrose Petals
Whisper White
Pink Pirouette
1 3/8” circle punch
Sponge Daubers
Basic Black Classic Ink Pad
Stampin’ Write Markers:
Basic Black, Pool Party, Raspberry Ripple
Big Shot
Snail Adhesive
Clear Block C and Clear Block E
Hearts a Flutter clear stamp set (Spring 2013 Spring Catalog)
Hearts a Flutter coordinating die set (Spring 2013 Spring Catalog)
Small Heart punch
Pool Party Bakers Twine
Dazzling Details glitter glue
Stampin’ Mat and Piercing Tool
Stampin’ Dimensionals
Punch the corners from the pink
paper, using the 1 3/8” circle punch. ( I measured 5/8” in from the sides and top or bottom to guide where I placed the circle punch)
Dauber the edges of the pink paper
using black ink.
Stamp assorted banner and heart
pieces and cut out with the Big Shot
machine, using their coordinating dies.
Poke a hole using the paper
piercing tool, at the two top corners of the three banner shaped pieces. (don’t
do anything with the large heart yet).
Thread your string through the
holes in the pieces, creating a clothesline effect.
Tuck the piece of thread on the
left side under the top left curved corner of the pink paper and hold down with
Snail tape on the back.
Tuck the piece of string on the
right side under the right straight edge of the paper and hold down with snail
tape on the back.
Apply more snail tape to the back
of the pink paper and attach to the card front.
Add a dimensional (cut in half) to
the top portions of the large heart and attach that to the middle and right
side banner.
Use a dimensional to attach the
small stamped heart to the large stamped heart.
Punch a heart using the small heart
punch from the aqua paper and attach it to the right side banner using snail
tape.
Add glitter glue where desired and
LET DRY!

(instructions coming soon!)
All from Stampin' Up
Rich Razzleberry card stock
Pool Party card stock
Whisper White card stock
Sycamore Street designer series paper (2013 S-A-B promo)
Pretty Petites clear stamp set (2013 S-A-B promo)
Petite Curly Label punch (2013 S-A-B promo)
Madison Avenue stamp set (2013 S-A-B promo)
Linen Thread
Rhinestone Basic Jewels
Chevron Embossing Folder
Stampin' Write Markers:
Tangerine Tango, Pool Party,
Rich Razzleberry, Island Indigo
Snail Adhesive
Thursday, February 7, 2013
What's with the supply list?
I thought I would take a quick moment to clarify why I have my supply list for each card. You would probably think, obviously so readers know what supplies to get to make the card! And this is very true.
A large majority of my supplies come from Stampin' Up, since it is my job to promote them, but also because I really do love their products!! I wouldn't support them if I didn't believe in their quality. And having a link on my page to order, makes it really easy for someone interested to get these supplies.
However, if you notice in some of the lists, I have clearance items that you need to check availability on, and some items from past catalogs and some items that were a promotion at the time. It would be easier to use all current supplies, but I know that isn't how life works. If you are a craft hoarder like me, you don't buy something and then stop using it once it's outdated right? (In my case, I don't use many things until they ARE outdated!) So I listed those items there anyway so you can see what we have sold in the past, and that there are really cool things on the clearance page. Or maybe you use Stampin' Up already, and have those products. Then you can say "Hey, look what I can do with those!"
And really, the most important thing for me, whether you ever purchase from me or not, is that I am proud of what I make and that I love to be able to share those images and ideas! So as always, enjoy and pass it on!
Week 4 (January 20th) - Above and Beyond
As with all of the other cards so far, I got to use a stamp set that had been sitting on my shelf since the summer time. It's not even a set that I would generally gravitate towards, but it was cute enough, and it was only $5 during one of Stampin' Up's awesome promotions! So I got it, and there it sat.
I have been reading assorted card making books lately, trying to freshen my ideas and learn everything that I can. As I was sifting through some new layout ideas, this set came to mind, and I swiftly added it to my list of card ideas to work on.
I won't go on and on about this card, because there certainly is a lot to say about it. The only thing I feel I need to say is, always ALWAYS try new things, because you just might love what you come up with. I sure did!

(instructions coming soon!)
All from Stampin' Up
Very Vanilla Card Stock
Pool Party Card Stock
Chocolate Chip Card Stock
Stampin’ Write Markers:
Pool Party
Calypso Coral
Early Espresso Classic Stamp Pad
3/8” Ruffled Ribbon Calypso Coral
One in a Million clear stamp set
Stampin’ Dimensionals
Snail Adhesive
Brown floral print from Spice Cake Designer Series Paper
(clearance)
Brad from Everyday Enchantment Ribbon and Brad pack
(Sale-A-Bration 2012)
Don't forget, you can order Stampin' Up products from me any time by going on my personal stamping site
Subscribe to:
Comments (Atom)